Why SUP Storage Is Trickier Than It Looks
SUP storage has gotten complicated with all the conflicting advice flying around. I moved into a downtown apartment three years ago fully convinced I’d have to quit paddle boarding altogether. Hard boards run 10 to 12 feet long and weigh anywhere from 25 to 35 pounds — they’re not exactly broom-closet material. Inflatables seemed like the obvious fix until I unrolled one in my hallway and realized that even deflated, the thing still demands serious square footage, plus a cool, dry spot nowhere near direct heat.
The real problem isn’t just finding space. It’s protecting a several-hundred-dollar investment from hazards that apartments specifically create: bathroom humidity, temperature swings near exterior walls, UV exposure on south-facing balconies, and mold sneaking into fabric you stored slightly damp. I’ve personally watched boards warp from careless placement. I’ve seen inflatables develop permanent creases from being coiled too tightly. These aren’t hypothetical disasters.
Most apartments offer three realistic storage zones: interior closets and hallways (climate-controlled but cramped), balconies and patios (accessible but weather-beaten), and under-bed areas (tight but protected). Each comes with real constraints. Hallways eat into shared living space. Balconies sometimes violate HOA rules outright. Under-bed storage demands consistent deflation discipline — which, honestly, most people don’t have after a long paddle.
Probably should have opened with this section, honestly. I spent two full months browsing wall mounts online before I ever measured my closet. A 10-foot hard board is 10 feet long. Your hallway almost certainly is not 10 feet of free, unobstructed wall. Know your board’s actual dimensions. Know your apartment’s actual square footage. Then shop.
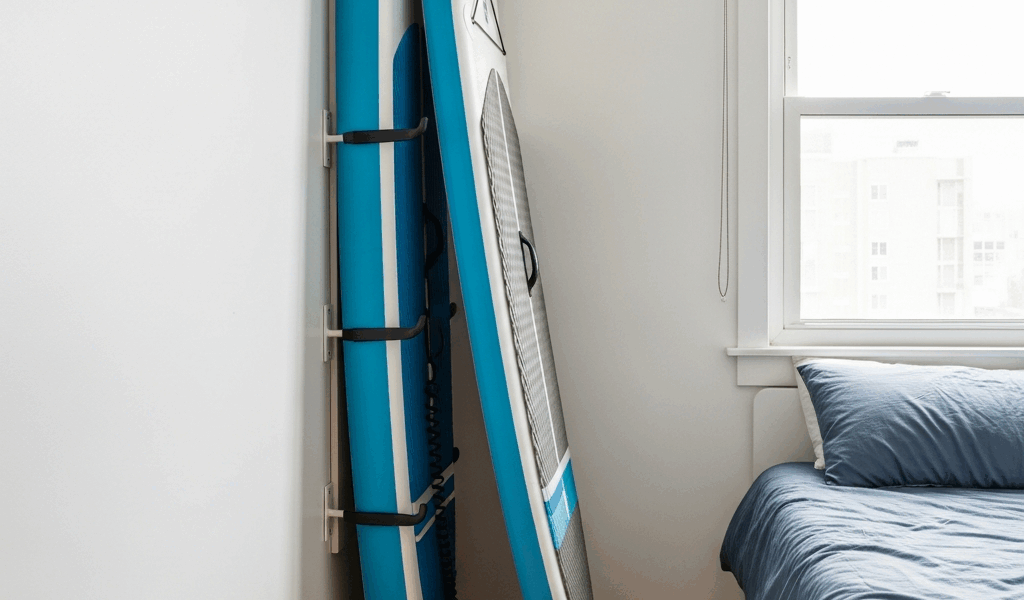
Wall Mount Racks — Best Use of Vertical Space
Vertical storage works. Full stop. Foam-padded horizontal wall mounts and ceiling hoists are genuinely the smartest solution for hard boards — at least if you have the wall real estate and ceiling height to pull it off.
Horizontal wall mounts come in a few varieties. Pulley systems let you hoist the board up toward the ceiling, which is brilliant for 8-foot ceilings paired with 10-foot boards — the board hangs nearly vertical, barely jutting from the wall. Foam-cradle racks hold boards flat at shoulder height or above. Some riders skip SUP-specific mounts entirely and go with heavy-duty kayak mounts rated for 75-plus pounds. Those work fine.
The catch is stud installation. Drywall anchors alone will not hold a 30-pound board long-term — not reliably, not safely. I used a Zircon MetalliScanner ($20 at Home Depot) and found studs in under a minute. Way faster than tapping walls and guessing. A basic stud finder runs around $15. Spend it. Don’t make my mistake of assuming you’ll “feel it” when the drill hits solid wood.
Weight limits matter more than people realize. Most residential-grade horizontal mounts handle 50 to 75 pounds safely. Check the spec sheet before you buy anything. A 30-pound hard board is fine. A hard board with an inflatable propped casually against it is asking for a 2 a.m. crash. Rolled inflatables compress to roughly 3 to 4 feet long and weigh around 8 to 10 pounds — well within limits for most mounts.
Installation mistakes scratch boards. If the foam padding isn’t thick enough, or it shifts during loading, the board’s rail scrapes directly on whatever plastic or metal cradle sits underneath. I’ve seen $600 boards dinged by $12 mounts installed in five careless minutes. Spend the extra $40 for quality padding. That’s what makes a good mount worth the investment to the people who actually use them season after season.
Renters: wall mounts mean holes you’ll patch when you leave. If your lease is strict about modifications, this matters. Adhesive mounts exist and work reasonably well for lighter inflatables, but they’re less dependable for hard boards and still leave residue behind when you eventually move out.
Storing an Inflatable SUP in a Closet or Under a Bed
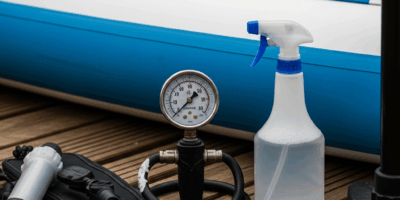
Inflatables are genuinely easier to live with once you know the rules. Deflate completely — not mostly, not almost, completely. A board left even slightly pressurized for weeks stresses the seams and valve and creates permanent creases in the material. Full deflation takes maybe five minutes using the pump’s exhaust valve. That’s a reasonable trade.
Rolling matters more than most guides admit. Start from one end and coil the board loosely, like rolling a sleeping bag rather than wrapping a fire hose. Tight rolls crease the material and hammer the valve area. A creased inflatable never fully rebounds — you’ll feel lumps in the deck for the entire following season. Ask me how I know.
Use a board bag if you have one. A $35 to $50 bag keeps dust off and stops the board from rubbing against wire shelf edges or getting scuffed by the shoe boxes crammed next to it. No bag? A clean garbage bag does roughly 80% of the job for zero dollars. I’m apparently a garbage-bag convert at this point, and it works for me while dedicated storage pouches never survived my closet situation intact anyway.
Closet or under-bed storage only works if that space stays between 50 and 80 degrees Fahrenheit year-round. Extreme cold makes PVC brittle. Extreme heat near a heating vent degrades the material from the inside out. I stored a board near an HVAC return one winter — noticed a soft spot developing on the bottom panel by February. Moved it to the bedroom closet. Problem solved, but the soft spot never fully recovered.
Damp storage is a mold magnet. If your inflatable came home wet from a session, dry it completely before rolling and sealing it away. A damp board in a closed closet will grow mold inside the fabric layers, and you won’t smell anything until you inflate it next spring. Open it flat, air dry for a full 24 hours, then store. Non-negotiable.
Balcony and Outdoor Storage Options
Balconies are tempting — they’re right there, you walk out, grab the board, go. But what is balcony storage, really? In essence, it’s convenient access. But it’s much more than that. It’s also months of UV exposure, temperature swings, and rain moisture working against your investment simultaneously.
UV is the slow killer. Sunlight degrades board material over months, not days. Your board won’t fail suddenly — it’ll gradually go soft, lose rigidity, and feel sluggish on the water in ways that are hard to pinpoint. A UV-resistant board cover or SUP bag runs $40 to $80 for decent quality. If your balcony catches afternoon sun from April through October, that $60 cover pays for itself in board longevity within a single season.
Upright leaning racks work on balconies that have the width for them. Basically a triangular frame holding the board vertically against the railing — minimal floor footprint, quick to grab, dries fast after use. The downside in a gusty city? Wind topples them. That was a $180 lesson for a friend of mine. Third-floor balcony, sustained 25 mph gusts, board face-down on the concrete below. Add a bungee strap to the railing. Seriously.
Check your HOA rules before placing anything on the balcony. Many buildings prohibit visible storage or gear that affects the building’s street-facing appearance. Violating this means fines or forced removal — I know someone who had a $200 wall mount system torn down by building management after a neighbor complaint. Read your lease before you drill anything, anywhere.
So, without further ado, the short version: inflatables on a balcony go deflated in a bag. Hard boards on a balcony get a cover. Both beat replacing a board.
What to Avoid — Storage Mistakes That Damage Boards
- Don’t store on bare concrete or tile without padding. Concrete wicks moisture and creates a cold, damp microclimate directly under your board. A towel, a sheet of cardboard, or a $6 foam mat solves this completely.
- Don’t leave inflatables pressurized long-term. Even slightly inflated, the seams take constant stress. Store fully deflated — every single time.
- Don’t hang hard boards by the leash plug. That small fitting isn’t engineered to support the board’s full weight. Use mounts that cradle the actual body of the board.
- Don’t stack heavy gear on top of a deflated board. Dumbbells, suitcases, storage bins — pile those on for a few months and the board compresses permanently. It won’t spring back.
- Don’t store damp boards in sealed spaces. Mold grows invisibly inside the material and ruins it before you ever see or smell anything wrong.
- Don’t lean hard boards against unpadded walls or sharp corners. The ding won’t sink the board, but it exposes the foam core and looks rough on a board you paid good money for.
Storage doesn’t have to end apartment paddle boarding. It just requires matching the method to your board type, your available space, and your local climate. Do that — actually do it, not just read about it — and your setup stays in the water where it belongs.


Stay in the loop
Get the latest paddleboard spots updates delivered to your inbox.